Halloween is a fun spooky day....so why not let your pages feel the same. Embrace the colors - orange, black, purple, and yellow. Have fun with the dark and grunge feel of a page.........enter the dark side, lol.
The ghost in the picture is my oldest son Morgan. He was having a blast with the sheet over his head making "boo" sounds trying to scare us a couple of days ago. As luck would have it i had my camera in my pocket and I was able to get this fun picture of him. Since then i have been mulling over how to create a layout this for this picture.
I love to create layers, it adds so much dimension to a page. Layers of papers, colors, embellishments, and textures gives so much depth and intrigue to a page........it keep you looking for more. In this page i was playing with the idea of the hard and the soft. The hard dark edge of the colors and Halloween, but the softness of the flowers, ribbon, and swirls make a great juxtaposition to each other. I also just love getting dirty playing with my distress inks, mists, and glitter.
I hope this inspires you to get dirty and to have fun playing a bit on the dark side of scrapbooking!
Come visit me at http://scraps-of-reflections.blogspot.com/
Enjoy!!
Erin R.
Monday, October 31, 2011
Sunday, October 30, 2011
Long Overdue...
I know this announcement is long overdue. I am so sorry for making you all wait but my life has been a little crazy and hectic (and it doesn't look like slowing down any time soon...sigh!). But without further ado, the winner for the September Inspiration Challenge is...
CAROL THENG (with her layout Cupcake).
Congratulations Carol!
Could you please send your mailing address to scrapbookkitswithjules@gmail.com and I will get your winner's kit out to you, as soon as possible.
Unfortunately, due to insufficient entries, there will be no sketch winner for September.
Ladies, thank-you for your participation. Without you, this wouldn't be possible.
And don't forget, you still have 2 more days to enter the October Challenges.
Labels:
challenges,
winners
Friday, October 28, 2011
Sewing threads & Scrapbooking?
Hi all! Juanna here! How's everyone doing? Just got back from a company retreat hence the mid day post. Today, I'm going to be sharing with you a little tip that I thought might interest you.
Okay, ladies (and gents!), if you sew, do you sometimes accumulate threads left over from sewing a button and you throw them away because they are neither short nor long to do anything else with it? Hold your horses! You can now keep them aside for scrapbooking!
Let me give you a little demostration on how I used some of those sewing threads on a layout.
(As I haven't been sewing, and jus for the purpose of this tutorial, I used some new sewing threads. You can do the same if you don't have threads to be recycled.)
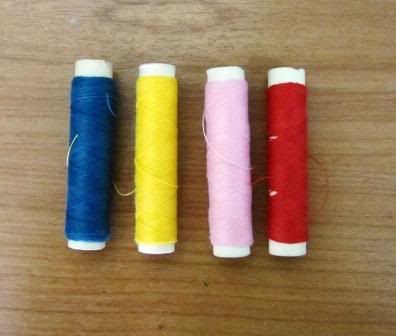
Here are the colours of threads on this sample layout:
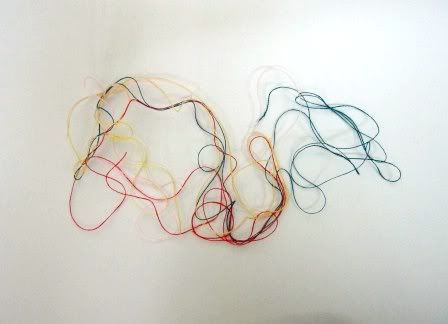
Next clump the different threads together. Mix them up, mess them up, tug them gently until you get a shape you desire with the messy mass of threads.
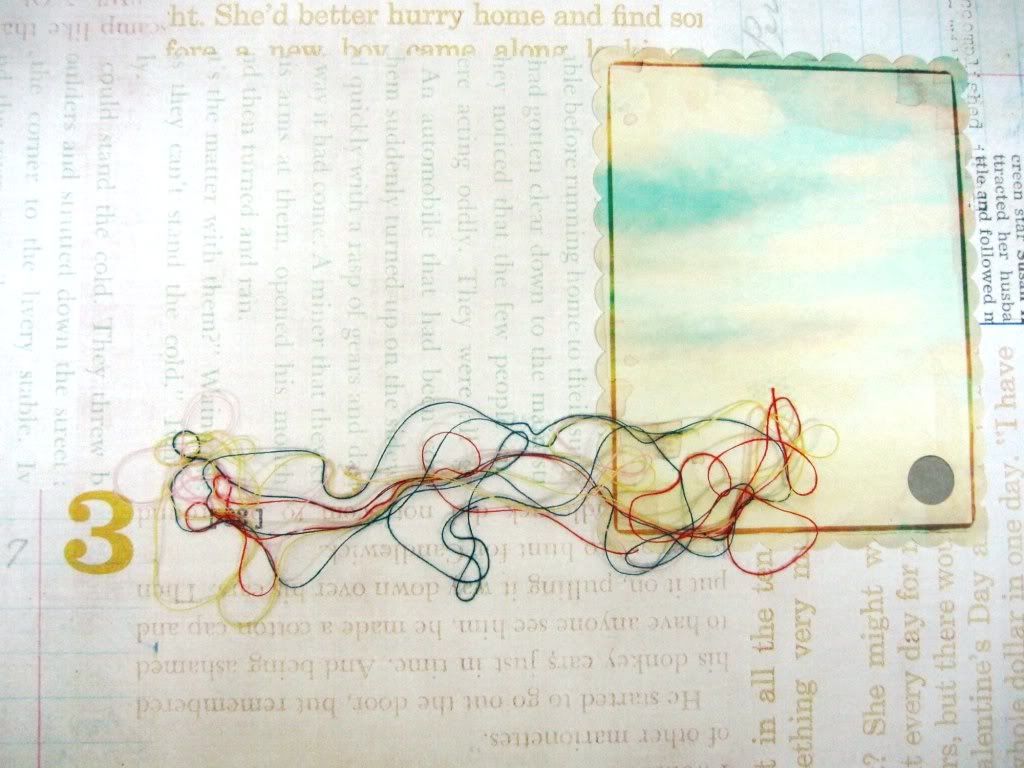
I used tape glue on the spots I want the threads to stick. *Just a note, for tape glue, I used really tiny bits on the different spots to get the threads to stick and not come off. It is ok for some part of the thread pile to be left lying without tape, as long the whole pile stays on the paper. So you may get straying bits but I guess, that is also a form of creativity on its own yeah? (:
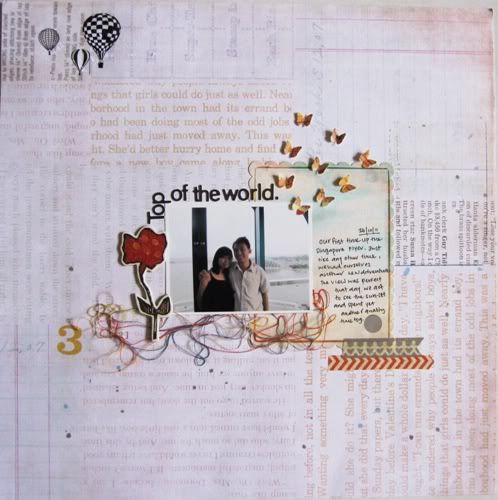
Once you have done that, you can go on and complete your layout with all the photos and materials you desire. Here's my layout using a mix of sassafras, DCWV, Kaisercraft, Mister Huey's and Tattered Angels mist (for the tiny splats).
Have a blessed weekend ahead and get scrappy! (:
Okay, ladies (and gents!), if you sew, do you sometimes accumulate threads left over from sewing a button and you throw them away because they are neither short nor long to do anything else with it? Hold your horses! You can now keep them aside for scrapbooking!
Let me give you a little demostration on how I used some of those sewing threads on a layout.
(As I haven't been sewing, and jus for the purpose of this tutorial, I used some new sewing threads. You can do the same if you don't have threads to be recycled.)
Here are the colours of threads on this sample layout:

Next clump the different threads together. Mix them up, mess them up, tug them gently until you get a shape you desire with the messy mass of threads.

I used tape glue on the spots I want the threads to stick. *Just a note, for tape glue, I used really tiny bits on the different spots to get the threads to stick and not come off. It is ok for some part of the thread pile to be left lying without tape, as long the whole pile stays on the paper. So you may get straying bits but I guess, that is also a form of creativity on its own yeah? (:

Once you have done that, you can go on and complete your layout with all the photos and materials you desire. Here's my layout using a mix of sassafras, DCWV, Kaisercraft, Mister Huey's and Tattered Angels mist (for the tiny splats).

Have a blessed weekend ahead and get scrappy! (:
Tuesday, October 25, 2011
Playing With Chipboard
Hello everyone, Leah here today! I hope that everyone is doing well on these last days of October! I can't believe the time has flown by so quickly! Another month past and almost time for Trick Or Treating (well I guess that all depends on where you are at...it's a definite here in the States!)
I wanted to come by today and share my kits for October. The kits are loaded up on some unusual goodies, like great, different papers and amazing ribbon. Plus some other goodies and...chipboard! Lots of great chipboard in this kit. So today I'd like to share with you what I did with the chipboard and hopefully that will give you idea's for your kit, or for the chipboard we all know we've got stashed around! LOL!
So here, I've used the letter chipboard pieces as is but have done many techniques to the raw chipboard flowers.
Using different shades of brown Distress Inks, I have colored some of the flowers, used different colors as well to stamp on as well. They all have inked edges as well, some brown's, some white. Then each flower center filled up with Bronze Stickles, very pretty in real life! I love how all these pieces turned out!
On this page I went to town inking these pieces! I used foam to add some purple and pink but then also took the Distress Ink pad and pressed it directly into the chipboard adding some more graphic color (which can also be seen on the floral background paper.)
The letters...well, I pulled off that brown finish to reveal the raw chipboard and then inked, and misted with a shimmer mist. Behind the hearts I've added dry embossed paper (from the kit) for some extra detail and texture.
And lastly and simply using the chipboard right from the package!
I certainly hope this gives you some ideas for spicing up the chipboard you have at home...It's an easy and inexpensive addition to your scrap stash and there are many uses for it! Can't wait to hear what you all did!
You can find my kit and the others by going HERE!
~Leah
Monday, October 24, 2011
Looking for a kit with a difference.....
Looking for a few fun layouts to do up this month...
Then head over to Scrapping with V and check out my Design Team kits for this month.... there is only TWO kit left... selling like hot cakes...
Here's the layouts you can create with this months kit.
Layout 1 - Friends
Layout 2 - Home Sweet Home
Layout 3 - Just You
Included in kit:
2 sheets card stock, 3 sheets Graphic 45 papers, Twiddleybitz chipboard borders, Creative Imaginations Epoxy Rhinestone alphabet, mixed flowers, rhinestone brads, rhinestone buckle, Bo-Bunny trinkets, doily, lace and various ribbons. Instructions also included.
Additional Items Required:
Floral stamp, script stamp, inks (as desired), template for dress form and tree trunk, Glimmer mist (if desired), journalling spot stamp, mini alphas, scraps of Kraft card stock, small piece of white ribbon, journalling pen, adhesive of choice, photos
Why not head over the Scrapping with V and check it all out.
TFL, Michelle W xxx
Then head over to Scrapping with V and check out my Design Team kits for this month.... there is only TWO kit left... selling like hot cakes...
Here's the layouts you can create with this months kit.
Layout 1 - Friends
Included in kit:
2 sheets card stock, 3 sheets Graphic 45 papers, Twiddleybitz chipboard borders, Creative Imaginations Epoxy Rhinestone alphabet, mixed flowers, rhinestone brads, rhinestone buckle, Bo-Bunny trinkets, doily, lace and various ribbons. Instructions also included.
Additional Items Required:
Floral stamp, script stamp, inks (as desired), template for dress form and tree trunk, Glimmer mist (if desired), journalling spot stamp, mini alphas, scraps of Kraft card stock, small piece of white ribbon, journalling pen, adhesive of choice, photos
Why not head over the Scrapping with V and check it all out.
TFL, Michelle W xxx
Friday, October 21, 2011
10 Days To Go...
Ladies, you are amazing! I have 3 more challenge layouts to share. And if you haven't joined in the fun yet, you still have 10 days to create a layout for the October Inspiration Challenge or the October Sketch...better get moving!!!

Pam Casey - Inspiration Challenge
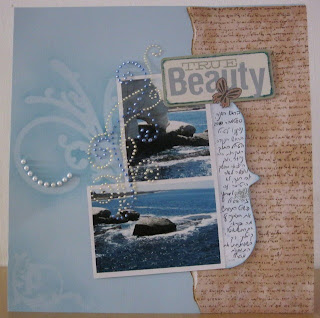
Libeeti - Inspiration Challenge

Leila Cassimira - Inspiration Challenge
Obviously the Inspiration Challenges are a hit with everyone! That is a relief, because I can't wait to share the November and December Challenges with you. (-: I have some exciting stuff heading your way... but now you will have to wait until November...hee! hee! hee!
Labels:
challenges,
Layouts
Monday, October 17, 2011
october inspiration challenge
Well I finally had the time to play with the october challenge. the peacock palette challenge
after choosing papers and stareing at the photo for a while here is what I came up withI used some bazzil cardstock with lots of distressing,paints and inks. I made some bronze embellishments with the melting pot and some UTEE and then added some real feathers. well what do you think?
after choosing papers and stareing at the photo for a while here is what I came up withI used some bazzil cardstock with lots of distressing,paints and inks. I made some bronze embellishments with the melting pot and some UTEE and then added some real feathers. well what do you think?
Using Medical Gauze on your Layouts {it looks really good!!}
Hi there ladies!
It's Helen again, from Durban, South Africa, sharing a recent page I made using some
Medical Gauze I bought at the pharmacy here!! Yes, you read that right! Sourcing the latest
& greatest scrapbooking products is a challenge for me here & I have to buy
most of what I use online from overseas, but there are a few things I manage
to source locally& medical gauze is one of them....
& greatest scrapbooking products is a challenge for me here & I have to buy
most of what I use online from overseas, but there are a few things I manage
to source locally& medical gauze is one of them....
Obviously the gauze comes in white but it is
very easy to dye it to any colour you like
very easy to dye it to any colour you like
by spritzing it with glimmer mist or even paint mixed with water in a spray bottle.
The best way to do this is to lay some plastic on the floor
(I do this inside to avoid the fine gauze getting blown in the wind)
then spray the mist on from about 40cm away - at about a 45% angle -
(I do this inside to avoid the fine gauze getting blown in the wind)
then spray the mist on from about 40cm away - at about a 45% angle -
this helps the mist to spread more easily rather than pooling in dark blobs!
No need to buy expensive plastic sheets - simply slice open a large refuse bag -
down the side and across the bottom - open it up and there you have it!
And for another - totally different effect - using exactly the same gauze -
you can actually paint it -
for a stiffer, more masculine look, like I have done here on this page.
you can actually paint it -
for a stiffer, more masculine look, like I have done here on this page.
The gauze I buy is HEALTHEASE by PLASTERMAN and comes in packs of 100 sheets
folded into 10cm squares {but when opened up are roughly A4 size}
and only cost me the equivalent of AUS$4 for ALL THAT!
So head on down to your local pharmacy & have a look around in the
First Aid Section - who'd have thought hey!?!
First Aid Section - who'd have thought hey!?!
For more ideas on how to use gauze on your layouts visit my blog at
http://helentilbury.blogspot.com
and if you decide to give my ideas a go pop in and let me know so I can come & check it out!
Have fun!!
and if you decide to give my ideas a go pop in and let me know so I can come & check it out!
Have fun!!
Labels:
Helen Tilbury,
tutorials
Sunday, October 16, 2011
Mini Rose Stems
Hi everyone,
It's Holly here. Today I wanted to share a simple technique I like to use sometimes when creating with small roses on layouts. Often the smaller roses are too tiny to stand out on a layout on their own, and a lot of us end up with so many of these tiny roses in our flower stash for that reason. So sometimes I like to create a stem of several of these mini roses at varying heights, such as in the layouts below:
To create these rose stems, twist the wire stems of the roses around each other at varying heights. I have also bent some of the spare wire stems into spirals to give a more natural foliage look, such as in the close up below.
You may even wish to add other items, such as leaves, twisted into your stem for another different look.
This also look great on cards or even twisted around OTP items. You can make them as long or short as you wish and are limited only to your imagination as to what you wish to add to the stems.
Hope you're having a great weekend. Don't forget to pop over to my blog for a visit :)
Holly xo
Saturday, October 15, 2011
Flower ideas for Scrapbook Layouts..
Hi Everyone
Rebekkah here.
I have been increasingly inspired by all the lovely layering everyone is doing at the moment and have incorporated it into my style at the moment. I love flowers and i love layering so i combined this technique called clustering and i will show you how it fitted into this layout.
Rebekkah here.
I have been increasingly inspired by all the lovely layering everyone is doing at the moment and have incorporated it into my style at the moment. I love flowers and i love layering so i combined this technique called clustering and i will show you how it fitted into this layout.
Clustering :
As you can see i have started with a crystal bird flourish, followed by fabric doily for a base, a material flag, then started the flowers with the one prima paper flower, added the green flowers randomly and then added the smaller flowers into position.
Some people do their layering differently. Some choose to randomly cut into patterned paper (often referred to as fussy cutting) and also then go onto make their flower clusters around this.
What do you like to do ?
I find the easiest way for me personally as i dont have alot of hours to spend on a layout with two small kids is to start with one flower and work around the edges as shown here but other ideas can include :
1) Start with one flower randomly placed in the bottom left corner of the layout and working to the rule of threes in scrapbooking design, place two other different sized flowers on the diagonal on either side.
2) Place about 5 small flowers randomly all over the layout and then working to the rule of threes, cluster each group.. it looks very effective.
Well i hope i have given you some ideas on clustering .. i always find little ideas such as these very informative for my layouts and its always good to try something different and new to keep your scrapping fresh and to keep the mojo alive.
Until next time
Happy Scrapping
Rebekkah xx
Labels:
Rebekkah - Clusters tute
More October Challenge Layouts...
Oh my goodness! We are only half way through the month, and the challenge layouts are rolling in. Let's start with the October Inspiration Challenge:

Mitra Pratt
Labels:
challenges,
Layouts
Monday, October 10, 2011
Our First October Challenge Layouts...
Ladies, you have been quick off the mark this month. I already have 5 challenge layouts to share, and it's not even half way through the month. Way to go!!!!

Agnieszka - Inspiration Challenge

Lynn Shaffer - Inspiration Challenge

Gillian Hume - Inspiration Challenge

Gillian Hume - October Sketch

Amanda - October Sketch
Considering the response to the Inspiration Challenges, I am guessing that they are a hit? (-: That's a good thing because I have a lot more where they came from, lol!!!! Happy scrapping everyone!
Labels:
challenges,
Layouts
Sunday, October 9, 2011
Interpreting a sketch
How do you work with a sketch?
Anyway the reason for this post was to talk about how i came about my layout using the October sketch
Here is the sketch again
So my first thought was just to use a few different sized sheets of patterned papers to make it look like a border, but what i have been doing recently is trying to think outside the box so instead of my first thought of the papers i thought ' I will sew the border instead '
This is what i came up with and i just LOVE how this layout turned out, I'm just so glad i thought about it first before just jumping in with my first idea
Hope you like what i did, and try this when you are doing your next sketch, I find it really helps us grow as scrapbookers and help develop our own style
See you soon
Caz :)
- Do you keep identical
- Or do you end up with a layout nothing like it in the first place
- Or kind of in between
Anyway the reason for this post was to talk about how i came about my layout using the October sketch
Here is the sketch again
So my first thought was just to use a few different sized sheets of patterned papers to make it look like a border, but what i have been doing recently is trying to think outside the box so instead of my first thought of the papers i thought ' I will sew the border instead '
This is what i came up with and i just LOVE how this layout turned out, I'm just so glad i thought about it first before just jumping in with my first idea
Hope you like what i did, and try this when you are doing your next sketch, I find it really helps us grow as scrapbookers and help develop our own style
See you soon
Caz :)
Labels:
Caz Hancock
Thursday, October 6, 2011
Keep Them Coming...
I am totally blown away with the amazing entries that have come flooding into my inbox, following our first ever, Monthly Inspiration challenge. I have another 3 gorgeous entries to share... Gillian Hume
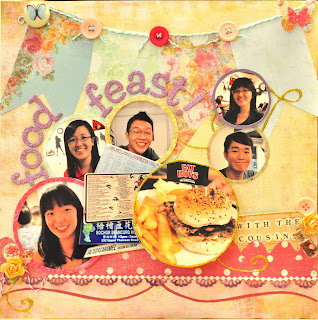 Cassandra Chen
You ladies rock! I just love how you have interpreted the inspiration photo. I can't wait to see what you all do with October's photo. (-: And yes, those entries have started to come in already. You ladies are quick!!!!
I will announce the September winners in a couple of days. Stay tuned...
 Gillian Hume
 Cassandra Chen
You ladies rock! I just love how you have interpreted the inspiration photo. I can't wait to see what you all do with October's photo. (-: And yes, those entries have started to come in already. You ladies are quick!!!!
I will announce the September winners in a couple of days. Stay tuned...
Labels:
challenges,
Layouts
Wednesday, October 5, 2011
Ribbon flower tutorial
Hi and welcome to my ribbon flower tutorial. I am sure many of you have seen it before but I am also sure there will some of you that havent tried this before.
I will show you step by step how to make the pink and white dotted ribbon flower in the left lower corner of my layout that also is a part of one of the September kits:
 ************
Now we will make a flower .
I recommend that you try to make one flower first before adding the glue dots for practice. This also let you see if your paper circle has the right size of the base circle.
Cut out a circle from a piece of paper.
************
 ************
Staple one end of the ribbon to the centre of the circle and add some glue dots or similar to the rest of the circle. Be careful so the ribbon does not stick.
************

************
Holding the circle with the attached ribbon in one hand, twist the ribbon until it is all twisted.
************

 ************
Start from the centre mounting the twisted ribbon in circles.
************


************
Mount the edge of the ribbon on the back side of the circle (with a glue dot) after cutting off any parts of the circle sticking outside of the ribbon.
************
 ************
Add the flower to the page.
Have fun creating!
I will show you step by step how to make the pink and white dotted ribbon flower in the left lower corner of my layout that also is a part of one of the September kits:
 ************
Now we will make a flower .
I recommend that you try to make one flower first before adding the glue dots for practice. This also let you see if your paper circle has the right size of the base circle.
Cut out a circle from a piece of paper.
************
 ************
Staple one end of the ribbon to the centre of the circle and add some glue dots or similar to the rest of the circle. Be careful so the ribbon does not stick.
************

************
Holding the circle with the attached ribbon in one hand, twist the ribbon until it is all twisted.
************

 ************
Start from the centre mounting the twisted ribbon in circles.
************


************
Mount the edge of the ribbon on the back side of the circle (with a glue dot) after cutting off any parts of the circle sticking outside of the ribbon.
************
 ************
Add the flower to the page.
Have fun creating!
Labels:
Petra,
Scrapbooking Kits,
Scrapbooking Techniques
Subscribe to:
Posts (Atom)


